Cellery on MicroK8s
A guide for deploying Cellery using MicroK8s for Development purposes.
Read on Medium (opens in a new tab)
There had been a lot of buzz around microservices, Kubernetes, and Istio recently. Cellery (opens in a new tab), a newcomer to this space, brings together some of these technologies and gives you a simplified approach to building, running, testing, and managing code-first composites on Kubernetes. Cellery can be deployed on top of any Kubernetes cluster and can provide you with many useful capabilities without much of a hassle.
This article will focus on deploying Cellery on MicroK8s (opens in a new tab). MicroK8s is a quite handy tool introduced by Canonical for spinning up a single-node Kubernetes cluster for development purposes in your computer. If you are a developer using Cellery, MicroK8s is a good option to get started in your Cellery journey.
Note: If you are new to K8s and wish to get started quickly with Cellery, please use the local setup option (opens in a new tab) as this is more convenient for new users.
Setting up MicroK8s
Note: This article is focused on Cellery v0.4.0 and the requirements such as the K8s version mentioned here may change in later versions. You can check the requirements from the Cellery SDK repository (opens in a new tab) if you need to use a different version.
Creating K8s Cluster
Note: You can skip this section if you already have a running MicroK8s cluster.
To get started, we first need to install MicroK8s (opens in a new tab) (channel 1.14/stable) by following the quick start guide. By default, the MicroK8s cluster will start up right after the installation.
After finishing the above steps, run the following command to check if the K8s cluster is running.
microk8s.status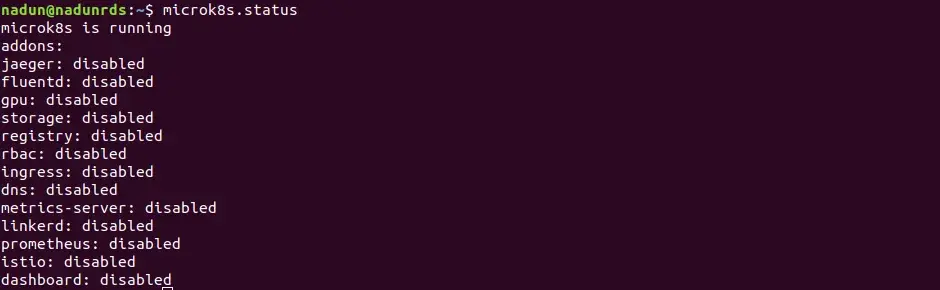
If you get a message saying microk8s is running your single node K8s cluster is successfully up and running.
To proceed with working with MicroK8s, the following command should be run to enable the MicroK8s DNS plugin. This will enable us to resolve K8s service names inside the K8s cluster.
microk8s.enable dns
The next step is to update the default Kubernetes configuration so that kubectl will point to the MicroK8s cluster.
Setting up Kube config
Since MicroK8s installs and configures its own CLI (microk8s.kubectl) for accessing the K8s cluster, the configuration in the user home needs to be updated to provide access for the default kubectl CLI (If you do not have kubectl installed, please follow the official documentation (opens in a new tab) for installing the CLI).
To get started let’s back up the existing Kube config (If this is your first time using kubectl, you may not have an existing configuration) and then copy the microk8s configuration to the default Kube config location.
mv $HOME/.kube/config $HOME/.kube/config.back
microk8s.kubectl config view --raw > $HOME/.kube/config
Now you should be able to access the MicroK8s cluster using kubectl. You can verify by running the following commands.
kubectl config current-context
kubectl get nodes
Now we are ready to get started with setting up Cellery!
Enabling packet forwarding to/from the pod network interface to/from the default interface on the host
To enable inter-pod communication you may need to enable packet forwarding to/from the pod network interface to/from the default interface on the host. You can check whether this is required by running the following command.
microk8s.inspect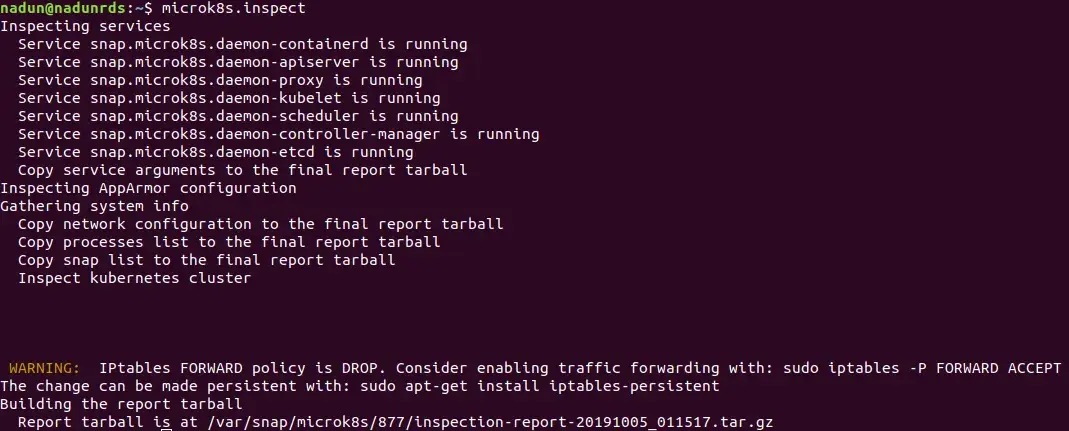
If this command gives you the above warning about packet forwarding, please run the following command as mentioned in the command output.
sudo iptables -P FORWARD ACCEPTThe next step is to install Cellery on top of this K8s cluster.
Installing Cellery on MicroK8s
Installing Cellery CLI
To get started with Cellery, please install the CLI from the Cellery SDK (opens in a new tab) repository. After the installation process finishes, the installation can be verified by running the following command.
cellery version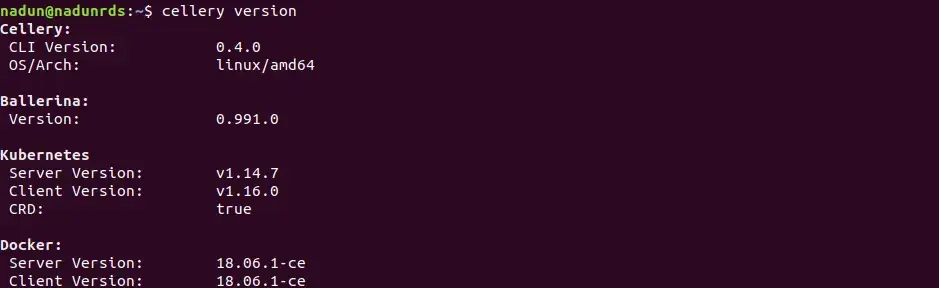
Note: You can also install the optional dependency (required for developing Cells), BallerinaLang (opens in a new tab). BallerinaLang v0.991.0 is required for Cellery v0.4.0.
Setting the IP of MicroK8s
As the first step, we need to find out the IP of the node running MicroK8s. If you are running MicroK8s on multipass, you can find this out by running the multipass list command. If you are using Linux, you can use the IP of any of the interfaces available on your machine other than localhost.
After figuring out the IP, the <CELLERY_INSTALLATION_LOCATION>/k8s-artefacts/system/service-nodeport.yaml file needs to be edited and the IP should be added to spec.externalIPs list (The default Cellery installation location in Linux is /usr/share/cellery and in MacOS it is /Library/Cellery).
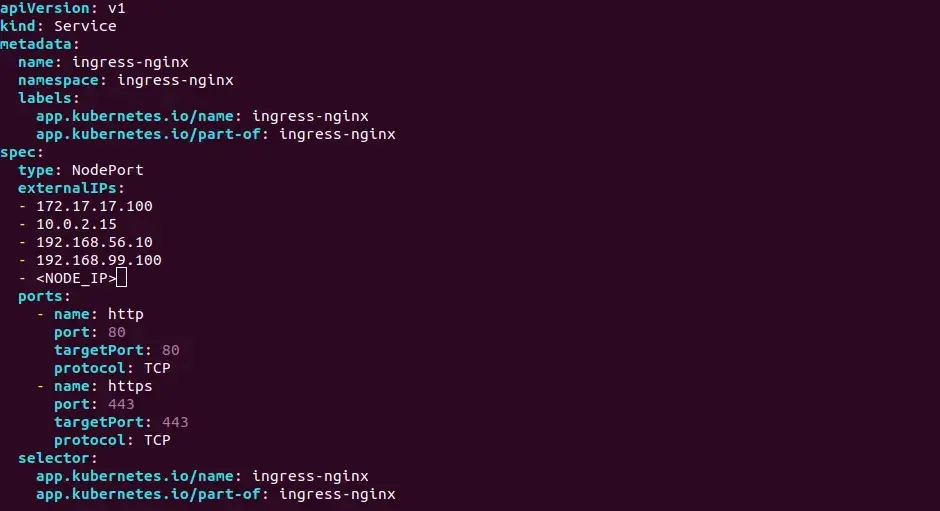
Also, for accessing the cluster from your machine, host entries need to be added by adding a new line to the /etc/hosts file.
<EXTERNAL_IP_USED> wso2-apim-gateway wso2-apim cellery-dashboard wso2sp-observability-api cellery-k8s-metrics idp.cellery-system pet-store.comInstalling Cellery run-time on MicroK8s
To get started with installing the cellery run-time on the MicroK8s, we need to execute the following command. The command will exit after making sure all the Cellery pods are up and running.
Note: This will install a basic volatile installation of Cellery, and this is mostly used for development purposes.
cellery setup create existing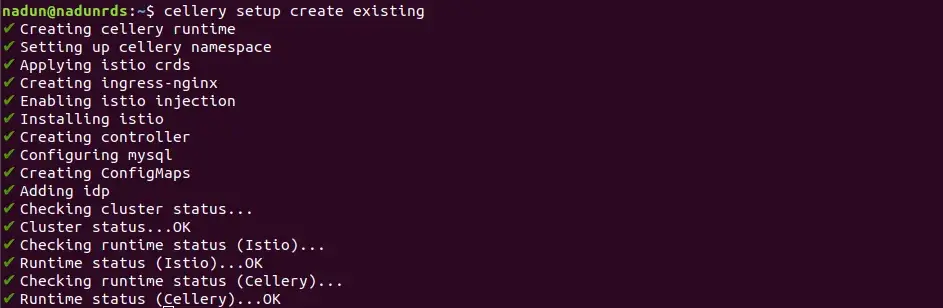
Voila! Now you have a basic Cellery run-time running in your machine.
Trying out Cellery
This article so far took you through installing a basic Cellery installation that doesn’t have most of the advanced features (Observability, Auto Scaling including scale-to-zero capability, API Management) provided by Cellery. Therefore, let’s try out the new Cellery run-time with the Cellery Pet Store.
To run the Cell, simply run the following command (This will pull the Cell Image from Cellery Hub (opens in a new tab) including its dependencies, and startup the Cell and its dependencies in the appropriate order).
cellery run wso2cellery/pet-fe-cell:0.4.0 -d -n pet-fe -l petStoreBackend:pet-be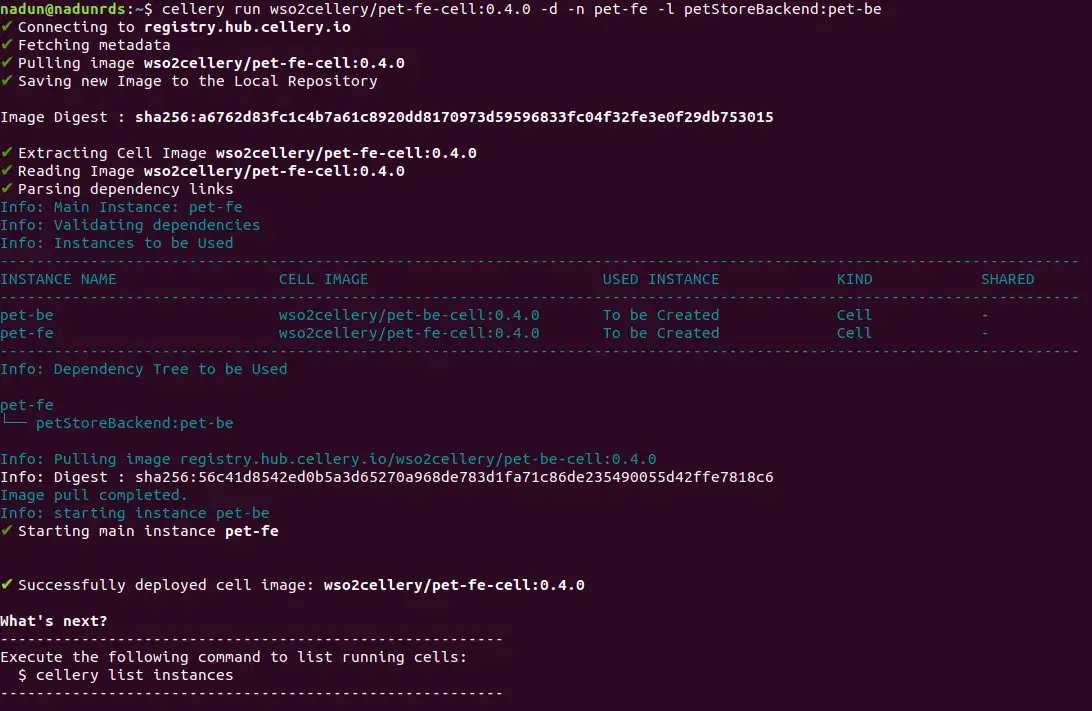
After the run command completes, you can check the Cell instances running on the run-time by running the following command.
cellery list instances
To access the application we deployed, visit http://pet-store.com using your browser.
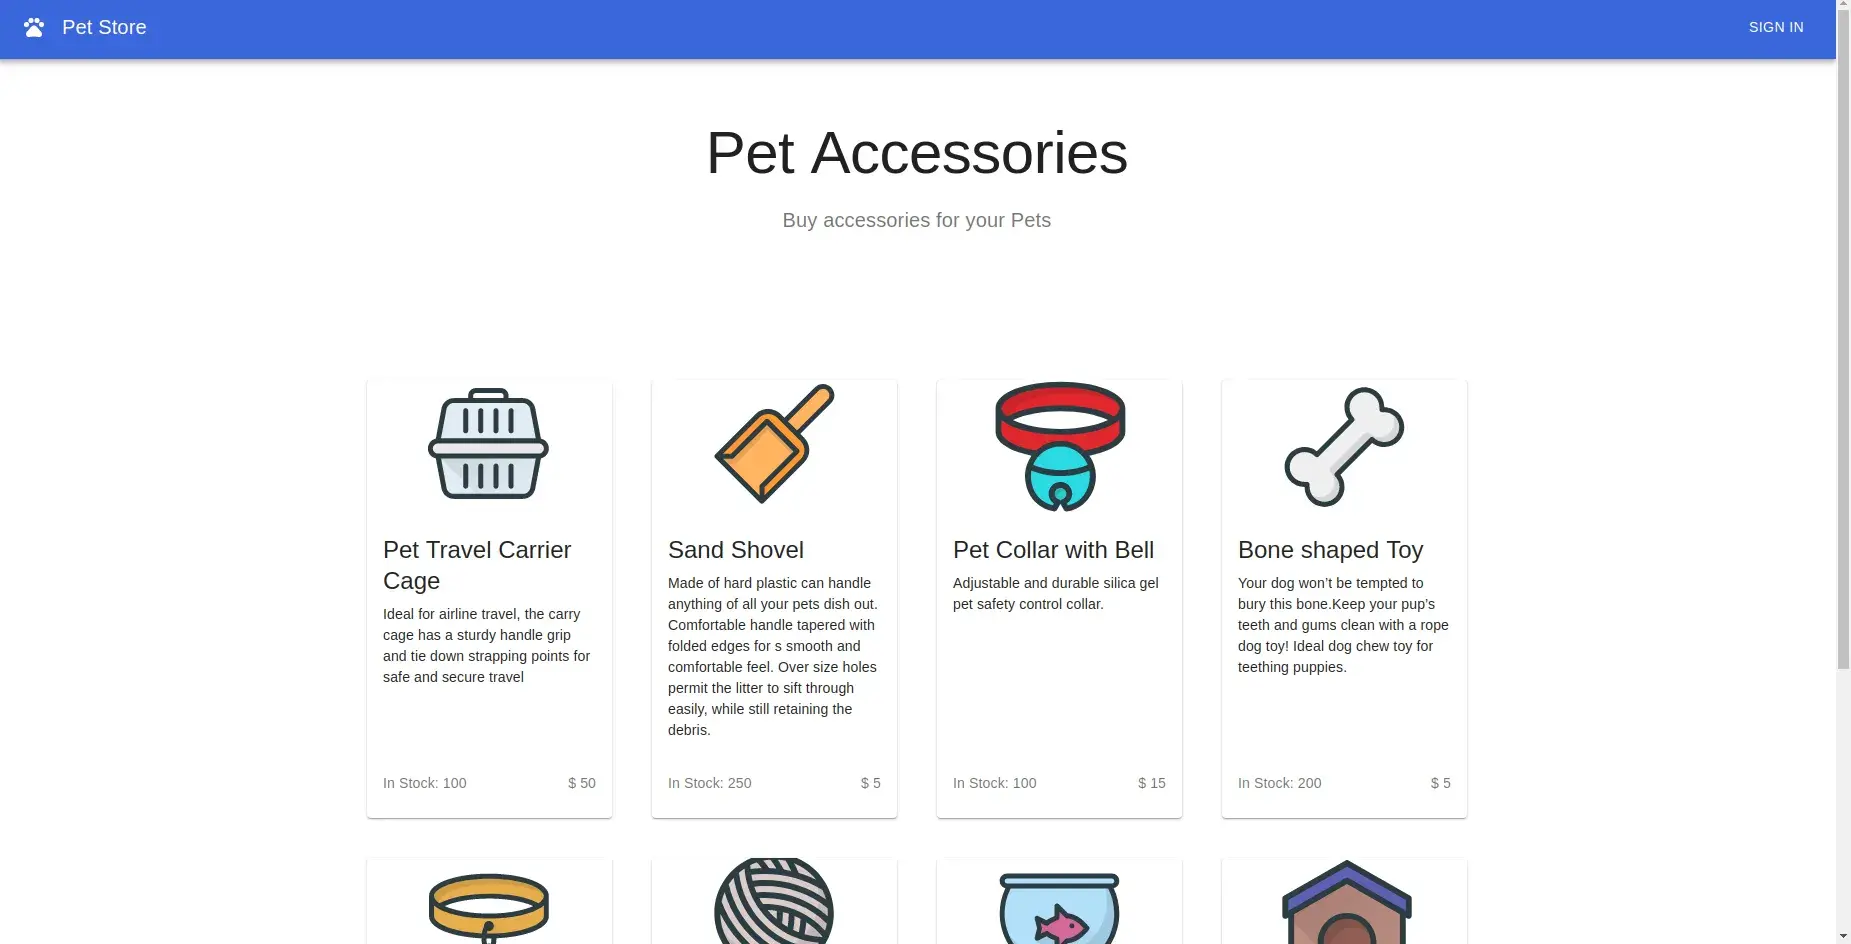
If you see the above page, you have successfully deployed the Pet Store application on Cellery.
What we have done above is deploy a simple web application along with its back-end micro-services as Cells. We have used a Basic installation of Cellery without most of its powerful capabilities such as Observability, Auto Scaling, Zero Scaling, and many more features. Cellery brings you all these capabilities along with the ease of deploying proper composites on Kubernetes clusters with ease.
Don’t forget to try out the Samples (opens in a new tab) which walk you through most of the features of Cellery.